Groups and Simplified User Management
This tutorial demonstrates how to use groups to manage common settings for multiple users and how to simplify the user creation page for delegated administrators.
Goal
Suppose you have the following requirements:
- Each user must be restricted to a local home directory at
/srv/sftpgo/data/<username>. - The maximum upload size for a single file must be limited to 1 GB.
- Each user must have an S3 virtual folder at
/s3<username>— each user can only access their own prefix in the bucket. - Each user must have an S3 virtual folder at
/shared— this folder is shared among users. - Some users have full access to
/shared, others have read-only access.
We can meet all these requirements by defining two groups and two virtual folders.
Step 1: Create the Virtual Folders
From the WebAdmin, navigate to Folders and click the + icon.
Private S3 folder
Create a folder named S3private. Set the storage to AWS S3 (Compatible) and fill in the bucket name, region, and credentials.
The key setting is the Key Prefix — set it to users/%username%/.
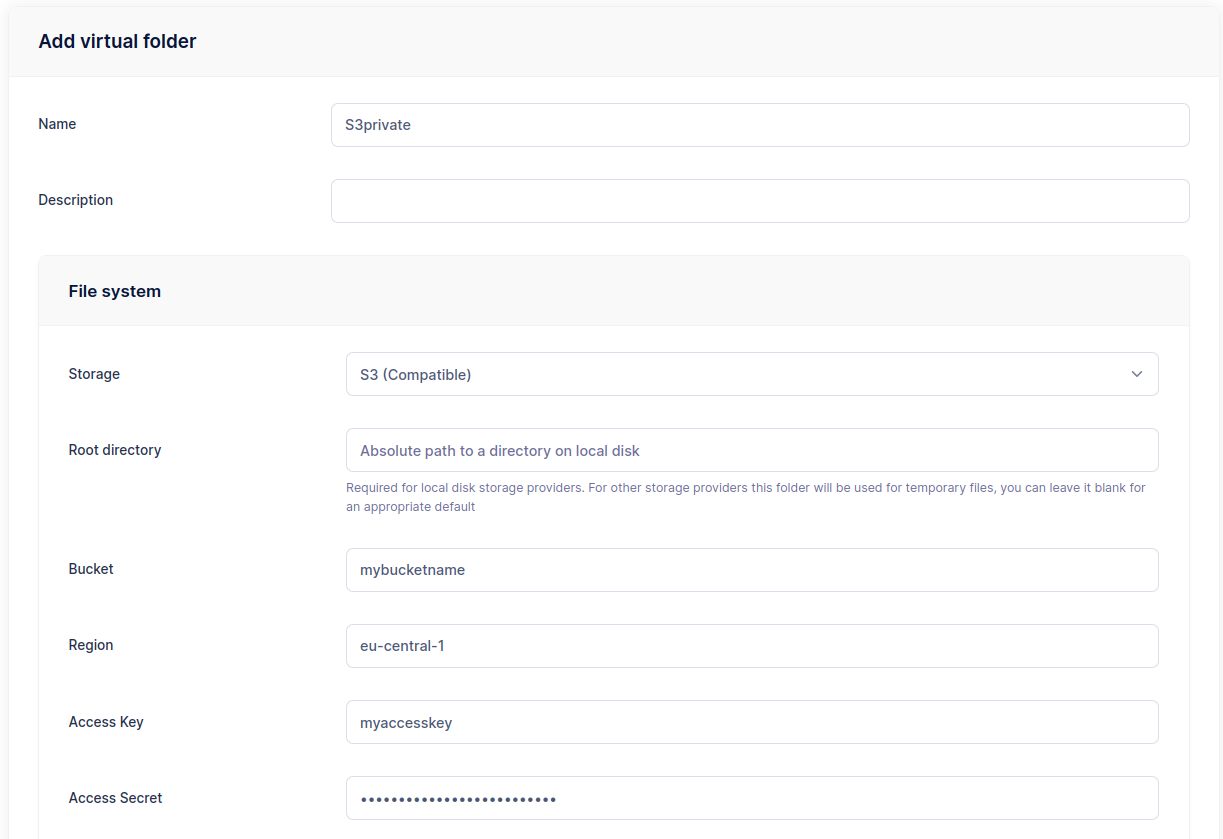

The %username% placeholder is replaced with the username of each user the folder is assigned to. This means every user gets their own isolated area within the same S3 bucket.
Shared S3 folder
Create another folder named S3shared with the same S3 settings, but set the Key Prefix to shared/. No placeholder here — all users share the same path.
Step 2: Create the Groups
Primary group
Navigate to Groups and click the + icon. Create a group named Primary.
- Home directory:
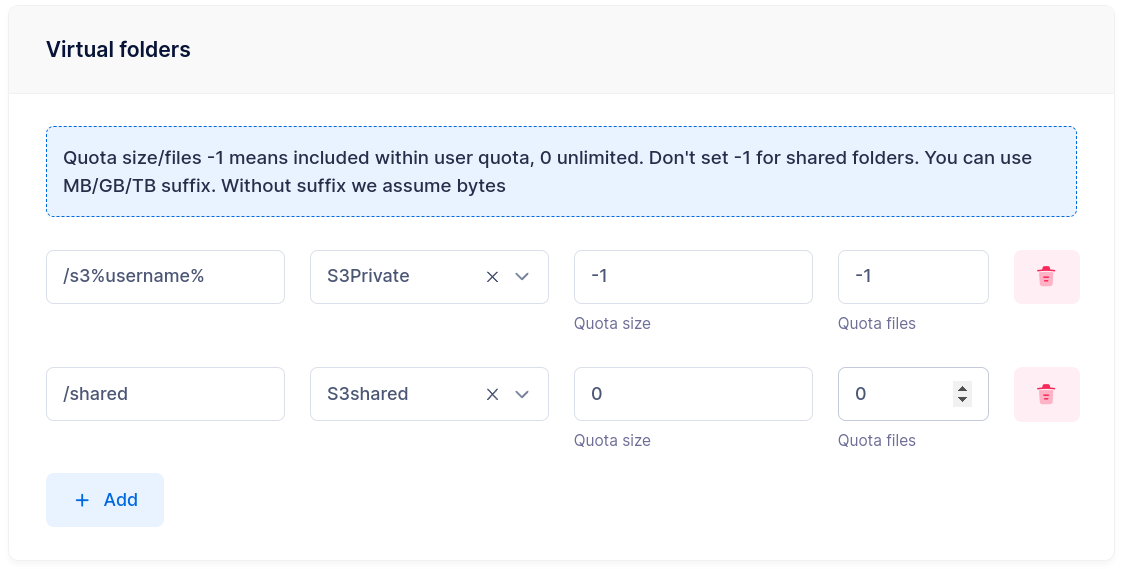
/srv/sftpgo/data/%username% - Virtual folders: add both
S3privateandS3shared - Max file upload size: 1 GB
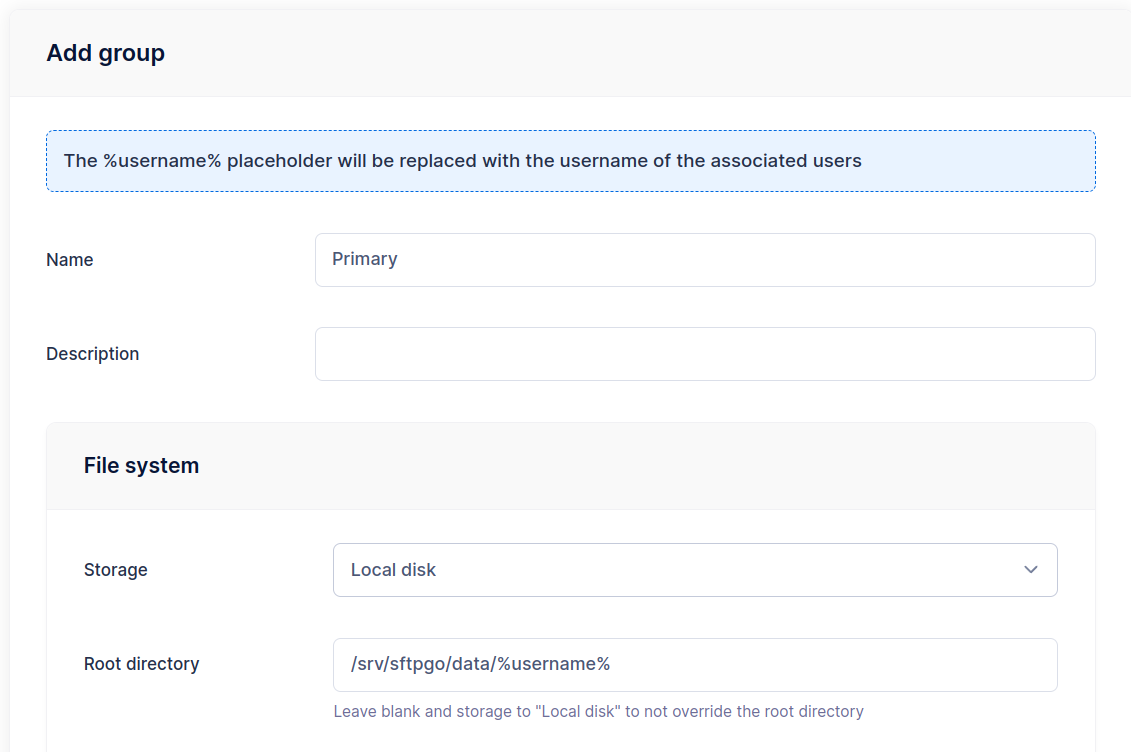
As with the folder key prefix, %username% in the home directory is replaced with the actual username when the group is applied.
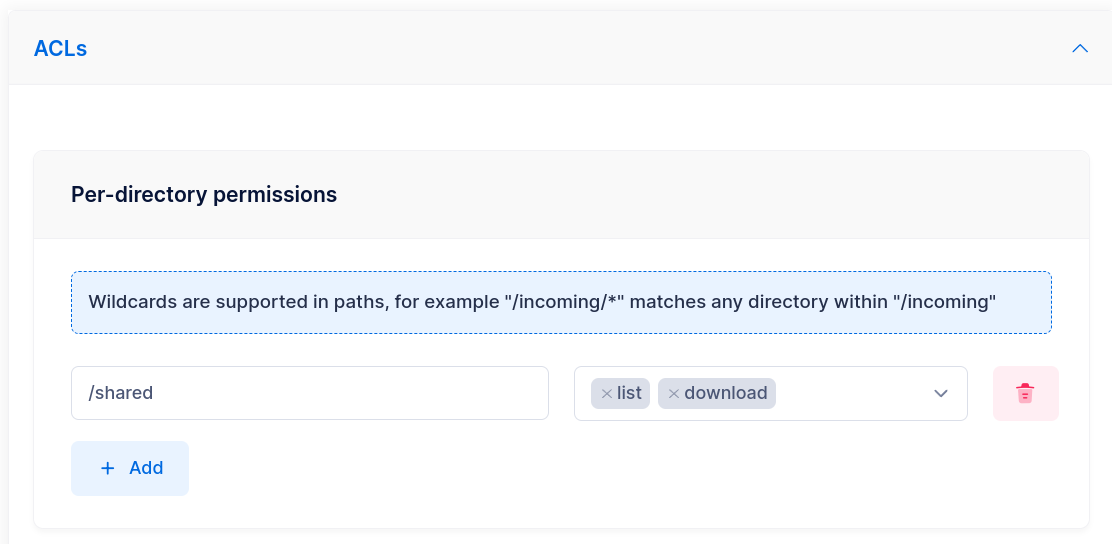
Read-only group
Create a second group named SharedReadOnly. In the ACLs section, set read-only permissions on the /shared path (list and download only).
Step 3: Create Users
Now create your users. For each user:
- Set
Primaryas the primary group. - For users who should have read-only access to
/shared, also addSharedReadOnlyas a secondary group.
The user inherits all settings from the primary group (home directory, virtual folders, upload limits). The secondary group overrides permissions on /shared to read-only.
Users who are not members of SharedReadOnly retain full access to /shared as defined in the primary group.
Simplified User Management
The add/update user page has many configuration options, which can be overwhelming for administrators who only need to create basic accounts. You can simplify this by configuring an admin account with default groups and hidden UI sections.
Configure a simplified admin
Navigate to Admins and create a new admin (or edit an existing one).
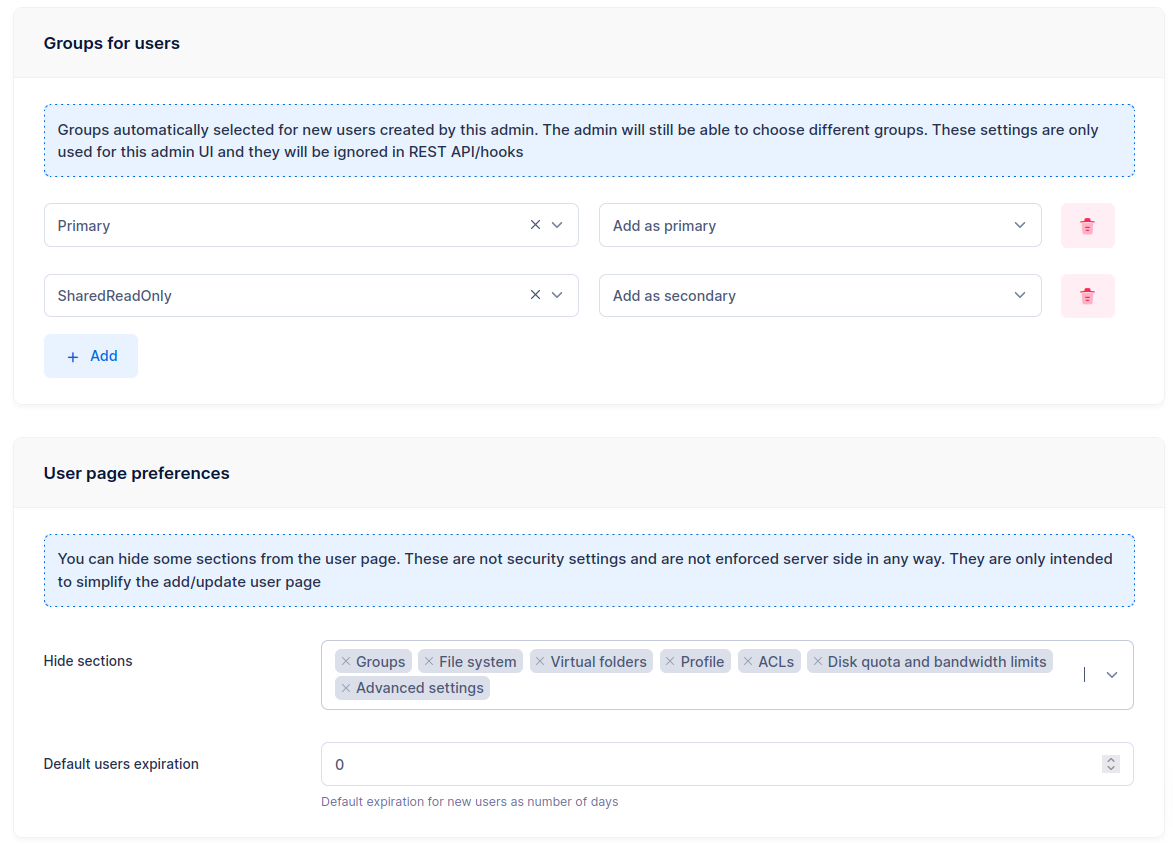
In the Groups for users section:
- Set
Primaryas the primary group. - Set
SharedReadOnlyas a secondary group (if applicable).
In the User page preferences section, hide all the advanced sections.
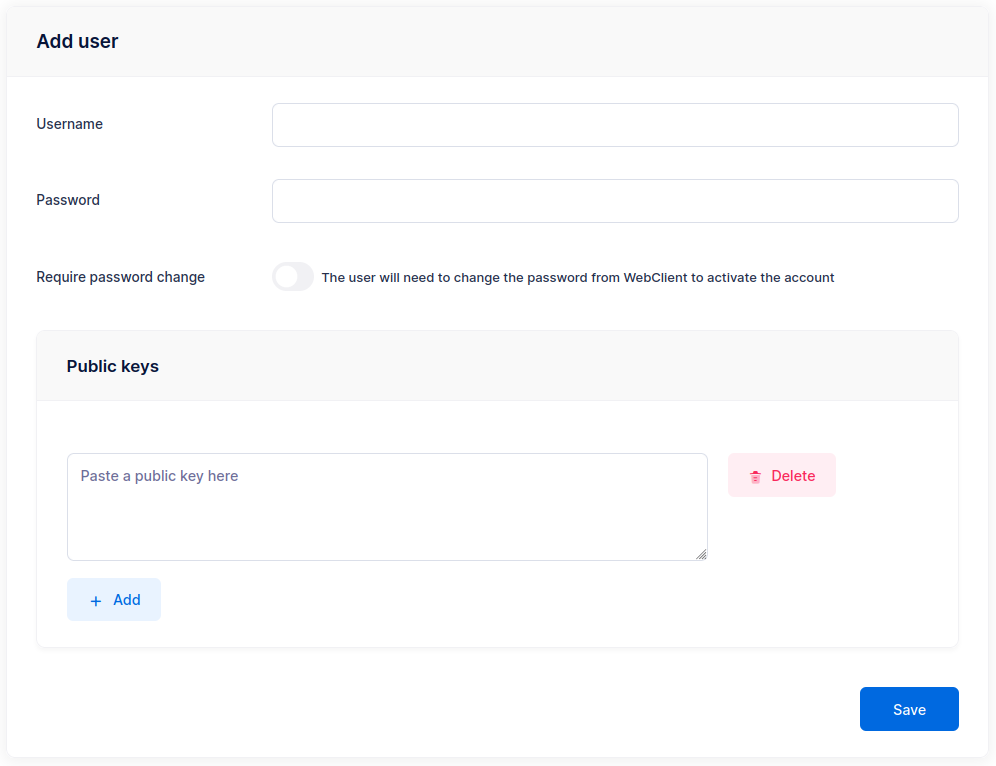
Result
When this admin logs in and creates a new user, they see a minimal form — just username and credentials. All other settings (home directory, storage, permissions, quotas) are automatically inherited from the assigned groups.
This is especially useful for delegated administration with roles, where restricted administrators manage users within their own scope.