Data Retention
This tutorial shows how to configure automatic data retention policies that delete or archive files older than a configurable threshold. This is a common compliance and storage management requirement.
How It Works
The Data retention check action scans a directory tree and applies per-folder retention policies. Files older than the configured threshold are automatically removed or moved to an archive folder, and a report can be sent via email or webhook.
The check runs in one of two modes, selected on the action itself:
- User-scoped (default). The rule iterates over the matching users; configured paths are resolved relative to each user's home directory. Best when the retention is a property of the user — e.g. each user's
/inboxor/temp. - Folder-scoped. The rule runs once as a system task on a single virtual folder, regardless of how many (or which) users have it mounted. Best when the retention belongs to a shared resource — a dropbox shared across users, a bucket prefix, or a whole storage area — and is independent of who happens to access it. See Folder-scoped retention below.
The two modes share the same configuration screen and the same report shape; the only difference is whether you fill the Source folder field on the action.
Step 1: Create a Data Retention Action
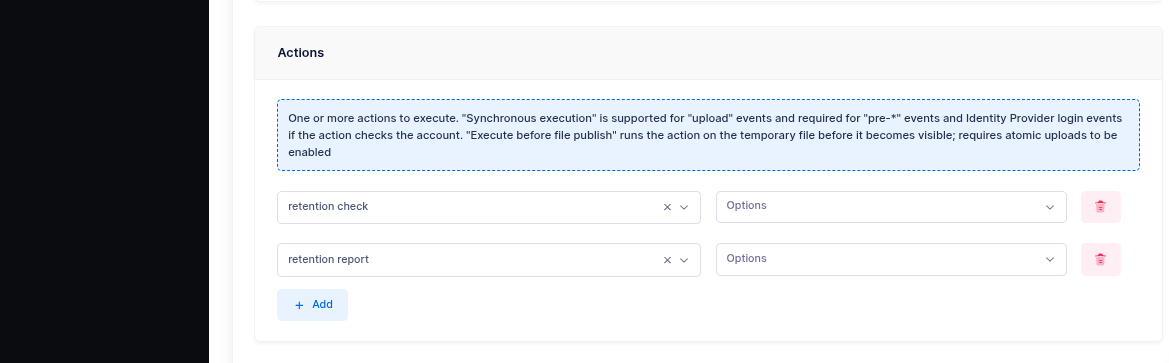
From the WebAdmin, expand the Event Manager section, select Event actions and add a new action.
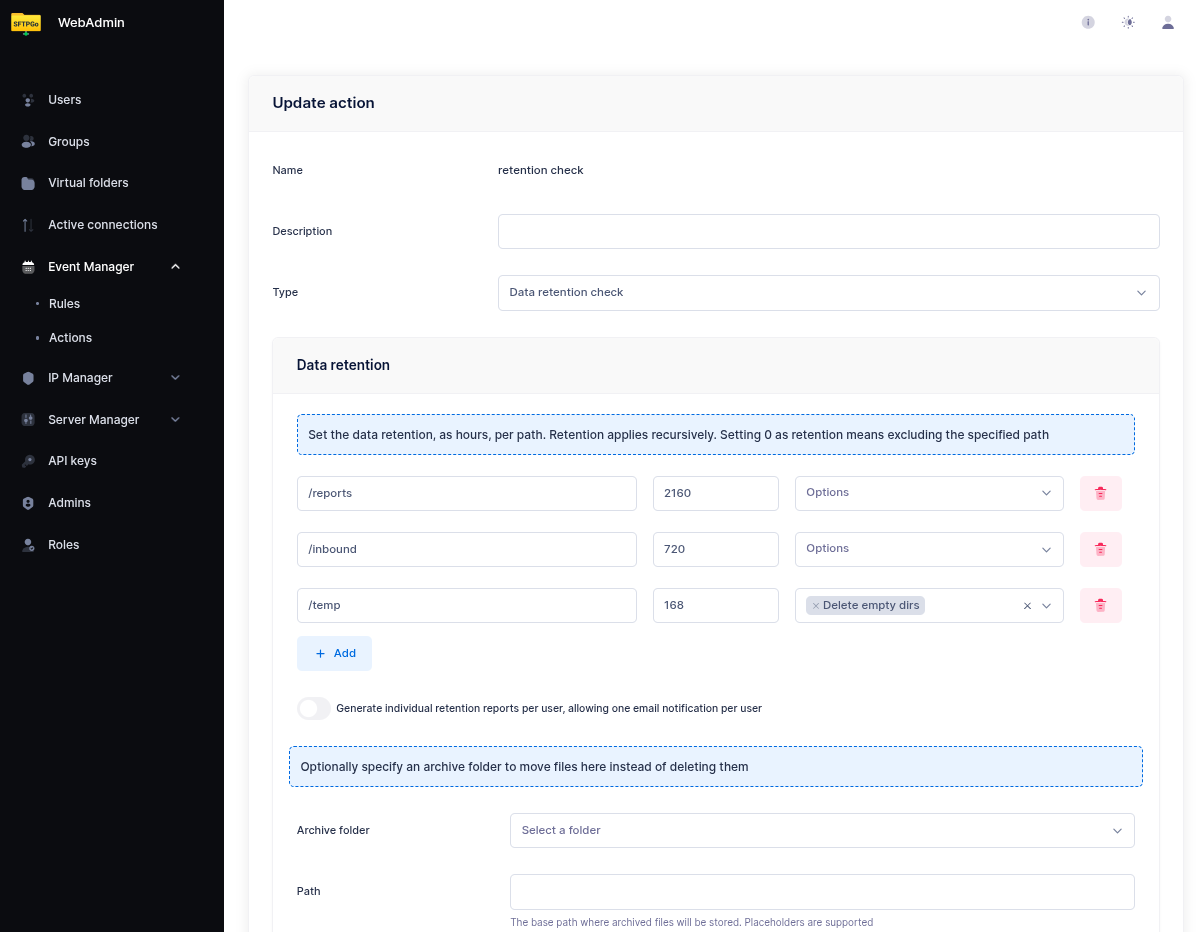
Create an action named retention check, set the type to Data retention check.
Configure the retention policies — each entry defines a virtual path and a retention period in hours:
| Path | Retention (hours) | Description |
|---|---|---|
/inbound |
720 | Delete files older than 30 days |
/temp |
168 | Delete files older than 7 days |
/reports |
2160 | Delete files older than 90 days |
 Paths are literal — no wildcards, no placeholders. A path like
 /inbound/* is not a pattern: it looks for a directory literally named * inside /inbound/ and finds nothing. To clean the contents of /inbound, just set the path to /inbound. The configured folder itself is always preserved — only its contents older than the retention period are removed. Sub-directories that become empty after cleanup can be removed too by enabling Delete empty directories on the entry.
If you need different retention paths for different groups of users, create one rule per group — each rule has its own action and its own user filter.
Archive Instead of Delete
If you prefer to archive files instead of deleting them, specify an archive folder. Files are moved to the virtual folder instead of being permanently removed. This is useful for compliance scenarios where you need to keep files accessible but outside the user's working directories.
The archive folder must be a virtual folder configured in SFTPGo — it can use any storage backend. For example, you could archive to a cheaper storage tier (e.g., S3 Glacier via lifecycle policies) while keeping the user's primary storage on standard S3.
Folder-scoped retention
Set a Source folder on the action when the retention policy belongs to a shared resource rather than to the users who happen to mount it. Common cases:
- A dropbox shared across multiple users — only the folder needs a retention window, not each consumer.
- A bucket prefix or a remote mount that contains long-lived data unrelated to any individual user.
- A whole storage area that needs a single retention sweep — define a virtual folder pointing at the storage root and use it as source.
When a source folder is configured:
- The action runs once as a system task on the selected virtual folder, regardless of how many users have it mounted.
- Paths in the retention list are interpreted relative to the folder root (
/,/sub, ...). - Rule-level user filters (Name / Group / Role) are ignored — the policy belongs to the resource, not to its consumers.
- The retention report exposes the folder name in the
folderfield; downstream notifications can use{{.Folder}}in templates.usernameis always the canonical__system__identifier. {{.ObjectName}}is set to the source folder name during the retention action (mirroring the user-scoped pattern where it is set to the username), so a single template likeRetention completed on {{.ObjectName}}works for both modes.- Split events has no effect — there is no per-user expansion.
If you want files moved to a "trash" folder rather than deleted, configure the action's built-in Archive folder field (covered above). Like every other system-executed action, retention deletes do not fire filesystem-event rules — see System-executed actions and chaining — so a separate "rename on delete" rule will never run. The archive folder is the supported pattern.
Step 2 (optional): Add a notification
The rule is already usable with just the retention check created above — SFTPGo will run the cleanup on schedule and log the results. A notification is only needed if you want to be actively informed. If you don't need one, skip ahead to Step 3.
Two notification channels are available: email and HTTP webhook. Pick the one that fits your workflow; you can also chain both on the same rule.
Option A — email notification
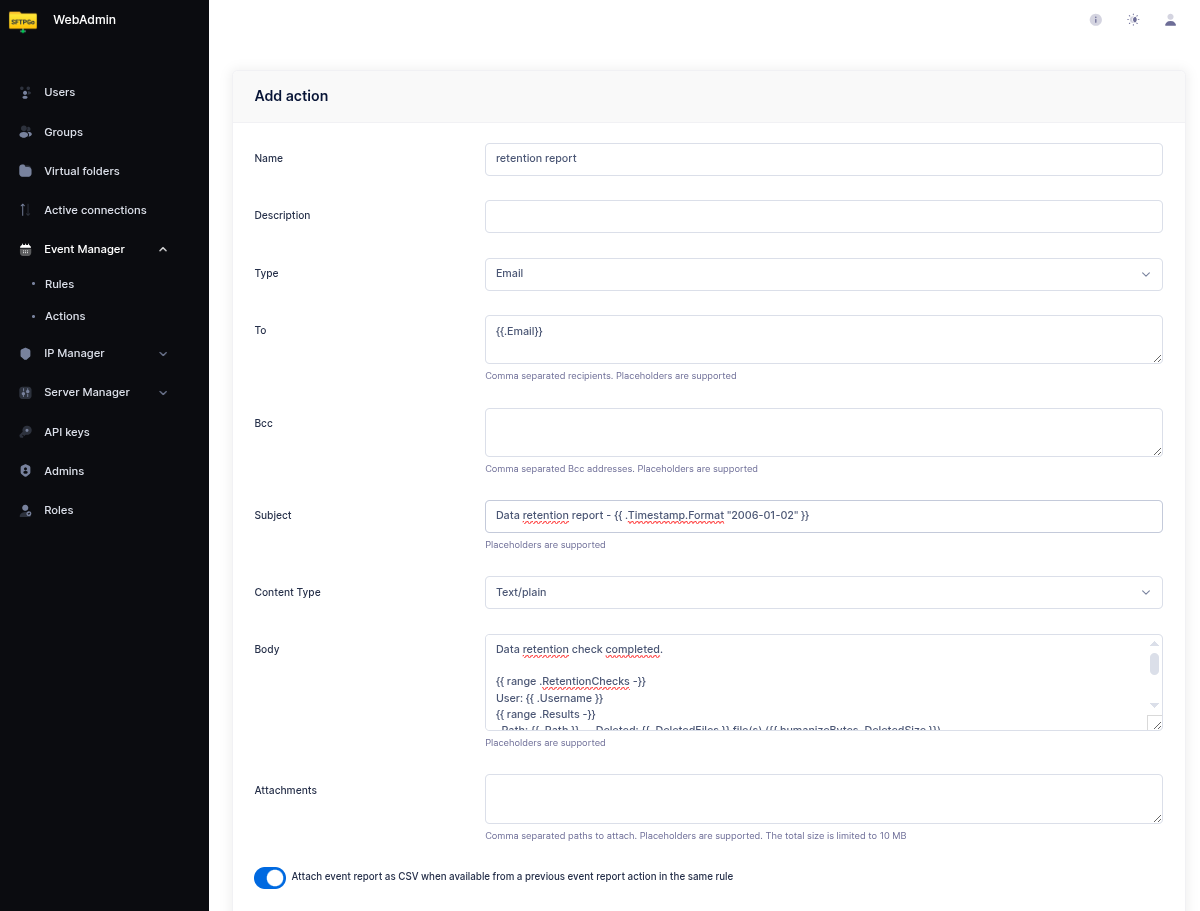
Create an email action (for example named retention report). A minimal configuration is enough:
- Recipients — one or more email addresses.
- Subject — any text, e.g.
Data retention report — {{ .Timestamp.Format "2006-01-02" }}. - Body — any text. A fixed string like
Data retention check completed. The detailed report is attached.works perfectly. - Attachments — add
{{.RetentionReports}}to attach the full detailed results as a compressed CSV archive.
The body is free-form and can be as simple or as elaborate as you like. If you prefer to see the summary inline in the email itself, the template below iterates over the checks and prints one line per folder:
Data retention check completed.

{{ range .RetentionChecks -}}
User: {{ .Username }}
{{ range .Results -}}
  Path: {{ .Path }} — Deleted: {{ .DeletedFiles }} file(s) ({{ humanizeBytes .DeletedSize }})
  {{- if .Error }} — Error: {{ .Error }}{{ end }}
{{ end }}
{{ end -}}

{{ if .Errors }}Errors: {{ stringJoin .Errors ", " }}{{ end }}
This is shown here as an example of what is possible — do not feel obliged to reproduce it. A one-line body plus the attached report is an equally valid and common choice.
Per-user notifications
If you want each user to receive their own retention report instead of a single aggregated email, enable Split events on the rule. In split mode:
{{.Email}}is automatically set to the user's email address.{{.ObjectName}}is set to the username.- The rule fires once per user, so each user receives only their own report.
Set the email recipients to {{ stringJoin .Email "," }} to automatically use the user's configured email address.
Option B — HTTP webhook
Create an HTTP action (for example named retention webhook) to POST the result to an external system. This is often a better fit than email when the consumer is a monitoring tool, a chat bot, or an internal service:
- Endpoint — the target URL (e.g.
https://example.com/sftpgo/retention). - Method —
POST(alsoGET,PUT,DELETEare supported if your endpoint needs them). - Headers — optional; add
Authorization,Content-Type, or whatever your endpoint expects. - Body — set to
{{.RetentionReports}}to send the compressed CSV archive as the raw request body. The receiving endpoint gets the same.zippayload that would otherwise be attached to the email.
Sending the results as JSON
If the receiving endpoint prefers a structured JSON payload over the zip archive, set the Body to {{toJson .RetentionChecks}} — the toJson helper serializes the retention results to JSON. Remember to add a Content-Type: application/json header (SFTPGo sets the content type only for multipart bodies; for a plain body it sends whatever header you configure).
A minimal JSON webhook action:
- Method —
POST - Endpoint —
https://example.com/sftpgo/retention - Headers —
Content-Type: application/json - Body —
{{toJson .RetentionChecks}}
The endpoint receives an array, one element per user that was processed:
[
  {
    "username": "userA",
    "email": ["userA@example.com"],
    "action_name": "retention check",
    "type": 0,
    "results": [
      {
        "path": "/inbound",
        "retention": 720,
        "deleted_files": 3,
        "deleted_size": 1048576,
        "elapsed": 125000000
      }
    ]
  }
]
Field notes: type is 0 for delete and 1 for archive; retention is in hours; deleted_size is in bytes; elapsed is a Go duration in nanoseconds; error and info are optional per-folder fields and appear only when present.
Step 3: Create a Scheduled Rule
Now select Event rules and create a rule named Daily retention check.
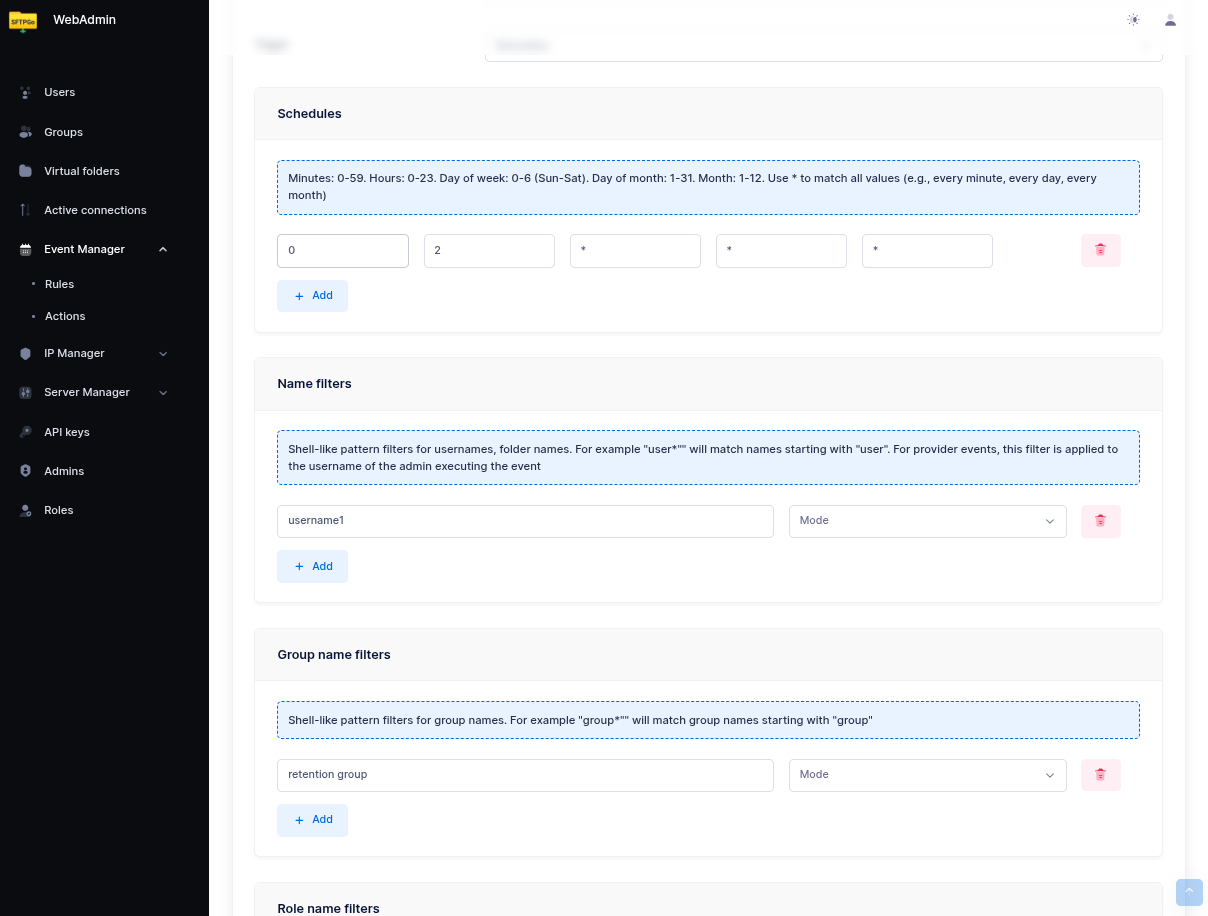
- Set Schedule as the trigger.
- Configure the schedule — for example, every day at 02:00 UTC: hours
2, day of week*.
Scoping the Rule
Paths go in the action, not in the rule. The paths to clean are configured inside the Data retention check action. The rule's Name / Group / Role filters select the users for which the action runs — they are not filters on file paths. Putting a path pattern like /folder/* under Name Filters makes the rule match zero users: it still fires on schedule, runs against nobody, and the notification email reports no deletions.
How the rule selects what to clean depends on whether the action has a Source folder configured. Read the subsection that matches your action; the Selecting the actions step at the end applies to both.
User-scoped rule
This applies when the action has no Source folder. The check runs in the user context: the path configured on the action is resolved relative to each matching user's home directory. For example, with a retention path of /inbound:
- On Linux:
userA(home/sftpgo/userA) → cleans/sftpgo/userA/inbound;userB(home/sftpgo/userB) → cleans/sftpgo/userB/inbound. - On Windows:
userA(homeC:\sftpgo\userA) → cleansC:\sftpgo\userA\inbound;userB(homeC:\sftpgo\userB) → cleansC:\sftpgo\userB\inbound.
The path on the action is always written in virtual form with forward slashes (/inbound) regardless of the underlying platform — SFTPGo resolves it against each user's filesystem.
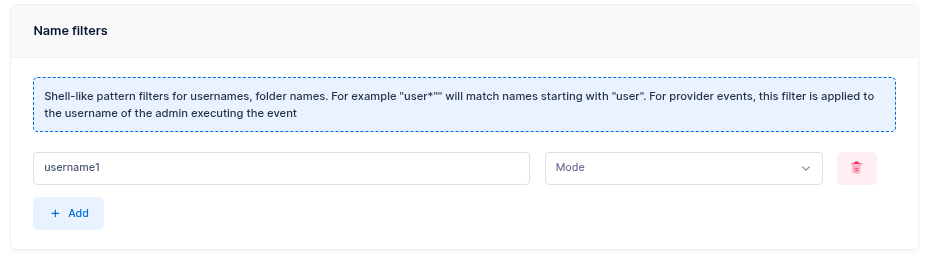
To restrict the check to specific users, add conditions on the rule:
- Name filters: usernames or patterns (e.g.,
username1orcustomer_*). - Group filters: group names.
- Role filters: role names.
If no filters are configured, the retention check runs for all users.
When the same rule needs to apply to many users (e.g., all customers, all vendors), assigning those users to an SFTPGo group and filtering the rule by group is usually cleaner than maintaining a list of usernames or a wildcard pattern: new users inherit the policy automatically as soon as they join the group, and removing a user from the group takes them out of the rule with no rule edit.
On instances with many users, prefer exact values (usernames, group names, or role names) over wildcard patterns — see Name, group, and role filters for the reason.
If any matching user has visibility over the entire storage (for example an admin-level user without key prefix restrictions), the retention check executed in their context will walk paths that span every other user's data. Either exclude that user with a name filter, restrict the rule to a known set of users, or — for storage-wide sweeps that should not depend on any user identity — use a folder-scoped rule (next subsection).
Folder-scoped rule
This applies when the action has a Source folder configured (see Folder-scoped retention above). The check runs once as a system task on the selected virtual folder, regardless of how many users have it mounted.
Rule-level Name / Group / Role filters are ignored — the policy belongs to the resource, not to its consumers — so you can leave them empty.
This is also the recommended pattern for storage-wide retention sweeps — a single policy that cleans every file older than a given threshold regardless of which user uploaded it. Define a virtual folder pointing at the storage root, set it as the action's source folder, and the check runs once without depending on any user identity.
Selecting the actions
As actions, select retention check — this is the only action strictly required. If you created a notification in Step 2, add it to the list as well (email, webhook, or both). Notification actions can be marked as Failure action if you only want to be alerted when something goes wrong.
Dry run
Enabling Dry run on the action produces the same report (counts, sizes, paths) as a normal run but performs no deletions and no archive copies. The report still flows through downstream email and HTTP-hook actions exactly like a real run.
The intended workflow:
- Configure the action with the retention paths you plan to enforce, enable Dry run, and trigger it on demand or with a one-shot schedule.
- Review the report (delivered to your mailbox or your webhook).
- Once the policy matches expectations, disable Dry run and switch to the recurring schedule.
Dry-run is also useful as a periodic sanity check alongside a real retention rule: a weekly dry-run rule with output piped to a different distribution list catches configuration drift (e.g., paths added that should not be in scope) before it causes data loss.
 Dry run is transparent to the rest of the system: no
 delete event is sent to notifier plugins (such as the eventstore plugin), no filesystem-event rules are triggered, and no archive copy is performed. The only output is the retention report itself, which carries a DryRun flag — the recommended pattern is to gate notification subjects with {{ if .DryRun }}[DRY RUN] {{ end }} so preview reports cannot be mistaken for real ones.
Note on File Modification Time
The retention check determines file age based on the last modification time. Be aware that clients can adjust this timestamp using the chtimes command (e.g., touch -t or SFTP setstat), which could cause files to be retained longer than expected — or deleted sooner.
If this is a concern, you have two options:
- Remove the
chtimespermission from the affected users or groups, preventing them from modifying file timestamps entirely. - Silently ignore chtimes requests by setting the following environment variable:
SFTPGO_COMMON__SETSTAT_MODE=1
With this setting, SFTPGo accepts chtimes requests without returning an error to the client, but does not actually change the file modification time. This avoids breaking clients that always send chtimes after an upload while ensuring that retention policies are based on the real upload time.